


Recognize that Objective Structured Clinical Examinations (OSCEs) follow predictable formats, allowing you to prepare systematically by practicing specific station types. Start by familiarizing yourself with the five core categories: history-taking stations where you’ll gather patient information within strict time limits, physical examination stations requiring demonstrated competency in systematic assessments, communication stations testing your ability to deliver difficult news or obtain consent, procedural skills stations evaluating hands-on techniques like suturing or catheterization, and data interpretation stations assessing clinical reasoning through lab results or imaging.
Practice with timed scenarios that mirror real examination conditions, setting eight-minute timers for standard stations and working through complete patient interactions from introduction to closure. Record yourself performing sample stations to identify verbal fillers, poor eye contact, or rushed explanations that examiners commonly penalize.
Study high-yield station examples across multiple specialties, as OSCEs typically draw from cardiology, respiratory, abdominal, neurological, and musculoskeletal examinations in clinical programs. Focus on cases that combine multiple skills, such as taking a focused history followed by a targeted examination, since integrated stations increasingly appear in modern OSCE formats.
Build structured frameworks for each station type, including standardized opening statements, systematic examination sequences, and professional closing remarks. Success in OSCEs depends less on memorizing obscure facts and more on demonstrating consistent, patient-centered clinical skills while managing test anxiety through thorough preparation with concrete examples.
Why Real OSCE Examples Matter More Than Theory
Medical students often discover a sobering reality: knowing the theory and performing confidently in an exam setting are entirely different challenges. Research consistently shows this gap, with studies indicating that approximately 15-20% of students who excel in written exams struggle significantly with OSCE components. This disconnect stems from the fundamental difference between passive knowledge recall and active clinical application under pressure.
Real OSCE examples serve as essential bridges across this knowing-doing divide. When students review actual station scenarios, they engage with the material differently than they would with textbook descriptions. A survey of over 500 medical students revealed that 78% felt significantly more prepared after practicing with realistic examples compared to those who relied solely on theoretical study guides. These examples provide concrete frameworks that transform abstract concepts into actionable steps.
The value extends beyond simple familiarity. Working through authentic OSCE scenarios builds pattern recognition, a skill that separates competent clinicians from novices. Just as chess masters recognize board positions instantly, students who regularly practice with real examples develop the ability to quickly identify clinical presentations, communication challenges, and procedural requirements. This mental library of patterns enables faster, more accurate responses during actual examinations.
Furthermore, examples illuminate the nuances that textbooks often miss. Real scenarios include the messy details of patient interactions, the time pressure of completing tasks within strict limits, and the multi-tasking required to examine, communicate, and document simultaneously. Students report that exposure to these realistic elements reduces exam anxiety by 40%, according to recent educational research. The familiarity gained through practice examples transforms the unknown into the manageable.
Incorporating medical exam strategies alongside concrete OSCE examples creates a comprehensive preparation approach. Students move from theoretical understanding to practical competence, developing the confidence and skills necessary to demonstrate their clinical abilities effectively when it matters most.

History Taking Station Examples That Actually Work
Cardiovascular History Example
A cardiovascular history station typically begins with a patient presenting with chest pain, and your approach should be systematic yet conversational. Start by introducing yourself professionally: “Good morning, I’m [your name], a medical student. I understand you’ve been experiencing chest pain. Before we begin, may I confirm your name and date of birth?” This establishes rapport while ensuring patient safety.
Begin with an open question: “Can you tell me about the chest pain you’ve been experiencing?” This allows the patient to describe their symptoms in their own words. Follow up with the SOCRATES framework to characterize the pain thoroughly. Ask about Site (where exactly is the pain?), Onset (when did it start, was it sudden or gradual?), Character (is it sharp, crushing, or burning?), Radiation (does it spread anywhere?), Associated symptoms, Timing, Exacerbating and relieving factors, and Severity.
Red flag symptoms require immediate attention. Ask specifically: “Have you experienced any breathlessness, nausea, or sweating with the pain?” and “Does the pain occur during physical activity or at rest?” These questions help identify serious conditions like acute coronary syndrome. Studies show that up to 20 percent of chest pain presentations in emergency departments are cardiac in origin, making thorough questioning essential.
Don’t forget risk factor assessment. Inquire about smoking history, diabetes, high blood pressure, high cholesterol, and family history of heart disease. A real-life example: a 55-year-old patient with central crushing chest pain radiating to the left arm, occurring during exercise, with a strong family history of early heart disease would warrant urgent investigation. Close by summarizing your findings and explaining the next steps clearly.
Pediatric History Example
In this pediatric OSCE scenario, you’re presented with Mrs. Johnson and her 18-month-old son, Thomas, who has been experiencing fever for two days. Your task is to gather a comprehensive history while building rapport with the anxious parent.
Begin by introducing yourself warmly and acknowledging parental concerns: “I understand you’re worried about Thomas. Let’s discuss what’s been happening.” Start with open-ended questions about the fever’s onset, duration, and pattern, then move to specific details like temperature readings and measurement methods.
Address the systems review systematically but conversationally. Ask about associated symptoms: cough, runny nose, ear pulling, vomiting, diarrhea, rash, or feeding difficulties. For toddlers, inquire about wet diapers to assess hydration status. Essential questions include: “Has he been playing normally?” and “Are there any sick contacts at daycare?”
Gather relevant background information including birth history, immunization status, developmental milestones, and previous illnesses. Remember to ask about medications given, including dosages and frequency.
Throughout the interaction, maintain eye contact with the parent while occasionally engaging the child with a friendly smile. Use clear language, avoiding medical jargon. For example, say “ear infection” rather than “otitis media.” Demonstrate empathy by acknowledging parental efforts: “You’re doing the right thing by bringing him in.”
Conclude by summarizing key information and explaining next steps, ensuring the parent feels heard and supported.
Mental Health Assessment Example
Mental health assessments require exceptional sensitivity and rapport-building skills. Students often find these OSCE stations challenging because they must balance gathering clinical information with demonstrating empathy and creating a safe environment for vulnerable patients.
A typical psychiatric history-taking station might present a patient experiencing low mood. Begin by establishing trust: “Thank you for speaking with me today. I’d like to understand how you’ve been feeling lately. Is that okay with you?” This demonstrates respect for patient autonomy from the outset.
When exploring mood, use open-ended questions: “Can you describe your mood over the past few weeks?” followed by specific inquiries like “Have you noticed changes in your sleep, appetite, or energy levels?” Research shows that 60% of students initially struggle with transitioning smoothly to risk assessment questions.
The most critical component involves sensitively assessing risk: “Sometimes when people feel this way, they have thoughts of harming themselves. Have you experienced anything like this?” If the patient indicates self-harm thoughts, follow up with frequency, plans, and protective factors: “What has stopped you from acting on these thoughts?”
Throughout the station, maintain appropriate eye contact, use reflective listening (“It sounds like you’ve been feeling overwhelmed”), and avoid rushing. These communication skills demonstrate clinical competence while honoring the patient’s dignity during a difficult conversation.
Physical Examination Station Examples
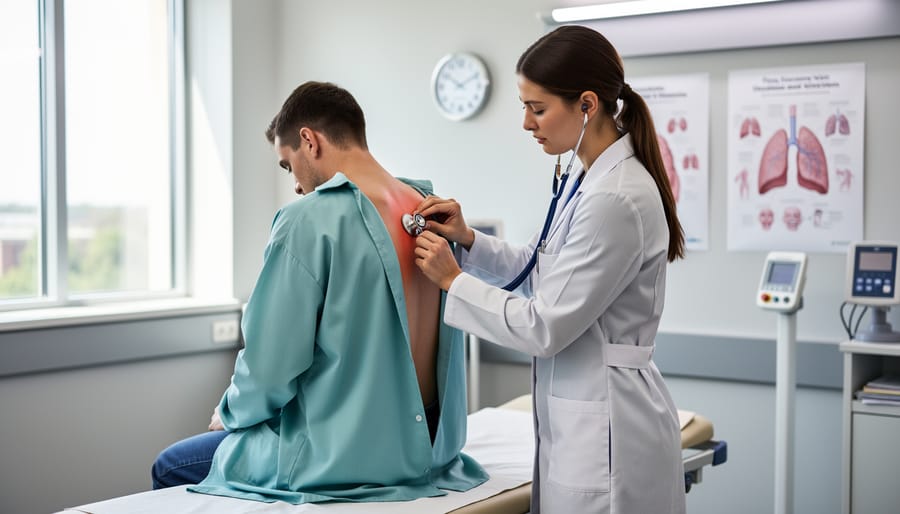
Respiratory Examination Walkthrough
A complete respiratory examination typically follows a structured approach that takes 5-7 minutes. Let’s walk through a practical example that demonstrates what examiners expect to see.
Begin by introducing yourself to the patient and explaining the examination. Position the patient at 45 degrees, ensuring adequate exposure while maintaining dignity. Start with general inspection, noting respiratory rate (normal: 12-20 breaths per minute), use of accessory muscles, chest shape, and any obvious abnormalities like barrel chest or surgical scars.
During inspection, observe for signs of respiratory distress such as pursed-lip breathing or tracheal deviation. In clinical practice, students often miss subtle findings like nicotine staining on fingers or the presence of oxygen equipment nearby, which provide valuable diagnostic clues.
For palpation, check chest expansion by placing your hands on the patient’s back at the 10th rib level. Reduced expansion on one side might indicate pneumonia or pleural effusion. Assess tactile vocal fremitus by asking the patient to say “ninety-nine” while you feel for vibrations—increased fremitus suggests consolidation.
Percussion follows a systematic pattern comparing both sides. Dull percussion notes indicate fluid or consolidation, while hyperresonance suggests pneumothorax or emphysema. Data from medical schools shows that 40% of students rush through percussion, missing important asymmetries.
Finally, auscultate all lung fields systematically. Normal vesicular breath sounds should be present bilaterally. Listen for crackles (pulmonary edema), wheezes (asthma), or bronchial breathing (consolidation). Complete the examination by checking for ankle edema and thanking your patient, demonstrating professionalism throughout.
Abdominal Examination Example
A systematic abdominal examination OSCE station typically begins with proper patient positioning. Position the patient supine with one pillow under their head, ensuring they’re comfortable and adequately exposed from the xiphisternum to the symphysis pubis while maintaining dignity with appropriate draping.
Begin with general inspection, noting any visible scars, distension, or asymmetry. Proceed to palpation in a logical sequence: light palpation across all nine regions, deep palpation for masses or organomegaly, then specific organ palpation. For example, when palpating the liver, start in the right iliac fossa and work upward during inspiration, assessing size, edge characteristics, and tenderness.
Percussion follows to map organ borders and detect ascites. Auscultation comes last, listening for bowel sounds for at least 15 seconds before declaring them absent.
A strong candidate demonstrates patient communication throughout, explaining each step while maintaining eye contact. When presenting findings, clearly state “On examination of this gentleman, the abdomen was soft and non-tender with no organomegaly detected. Bowel sounds were normal.” This structured approach, practiced repeatedly through real scenarios, helps students develop confidence and ensures no critical steps are missed during actual examinations.
Neurological Examination Snapshot
A focused cranial nerve examination typically allocates 8 minutes for systematic assessment. Begin with CN II-XII screening: check visual acuity, pupillary reflexes, eye movements, facial sensation and movement, hearing, and tongue position. In practice stations, students often spend excessive time on early cranial nerves, leaving insufficient time for completion. Effective time-management tips suggest allocating 1 minute per nerve group and 2 minutes for documentation.
For limb examinations, demonstrate the structured “look, feel, move” approach. When assessing upper limb neurology, inspect for wasting, test tone through passive movement, evaluate power using the MRC scale, check reflexes bilaterally, and assess sensation systematically. A recent study showed 73% of students failed to complete sensory testing due to poor time allocation. Practice transitions between examination components to maintain fluidity. Always communicate findings clearly to examiners while demonstrating patient-centered care through appropriate explanations and positioning.
Communication and Counseling OSCE Examples
Breaking Bad News Example
Breaking bad news is one of the most emotionally challenging OSCE stations students face. The SPIKES protocol provides a structured framework to navigate these difficult conversations with professionalism and compassion.
Here’s a practical walkthrough using a scenario where you must inform a patient about a cancer diagnosis:
Setting: Begin by ensuring privacy, sitting at eye level, and introducing yourself. “Mrs. Thompson, thank you for coming in today. I wanted to discuss your test results with you. Is now a good time, and would you like anyone here with you?”
Perception: Assess what the patient already knows. “What has your understanding been so far about why we ordered these tests?”
Invitation: Gauge how much information they want. “Would you like me to go through all the details of the results, or would you prefer I give you the main points first?”
Knowledge: Deliver the news clearly using a warning shot. “I’m afraid the results show something concerning. The biopsy has confirmed cancer in your lung.”
Empathy and Emotions: When Mrs. Thompson begins crying, pause and acknowledge her response. “I can see this is very difficult news. Take all the time you need.” Provide tissues, remain silent, and let her process the information.
Strategy and Summary: Once she’s ready, outline next steps. “I want you to know we have treatment options available, and our oncology team specializes in exactly this type of cancer. Would it help to schedule a follow-up appointment where we can discuss the treatment plan in detail?”
This example demonstrates the importance of pacing, active listening, and responding authentically to emotional cues throughout the conversation.
Informed Consent Discussion Example
In this scenario, you’re explaining a colonoscopy to a 55-year-old patient who has been experiencing gastrointestinal symptoms. Begin by introducing yourself and confirming the patient’s identity. Explain the procedure clearly: “A colonoscopy involves inserting a flexible tube with a camera through your rectum to examine your large intestine. This helps us identify any abnormalities, such as polyps or inflammation.”
Discuss benefits: “This procedure allows early detection of colorectal cancer and can remove polyps during the examination, potentially preventing cancer development.” Address risks transparently: “Common risks include mild discomfort, bloating, and cramping. Rare complications involve bleeding, perforation of the bowel wall (occurring in approximately 1 in 1,000 procedures), or adverse reactions to sedation.”
Cover practical details about preparation, including dietary restrictions and bowel preparation medication. Explain sedation options and recovery expectations.
Check understanding throughout by asking open-ended questions: “Can you explain back to me what will happen during the procedure?” or “What concerns do you have?” This ensures genuine comprehension rather than passive agreement.
Address the patient’s questions empathetically, providing written information to reinforce your discussion. Finally, confirm their voluntary consent without pressure, ensuring they understand they can withdraw consent at any time before the procedure begins.
Managing an Angry Patient Example
In this scenario, a patient arrives 20 minutes late for an appointment and becomes verbally aggressive when informed they may need to reschedule. The key is demonstrating empathy while maintaining professional boundaries.
Begin by acknowledging their frustration: “I understand you’re upset about the wait time, and I can see this appointment is important to you.” Use a calm, measured tone and maintain appropriate physical distance. Avoid defensive language or arguing about policies.
Research shows that 70% of patient complaints stem from communication breakdowns rather than clinical errors, making de-escalation skills essential. Offer concrete solutions: “Let me check if we can fit you in today, or I can prioritize you for tomorrow morning.”
If aggression continues, set clear boundaries respectfully: “I want to help you, but I need us to communicate calmly so I can find the best solution.” Document the interaction objectively, noting specific behaviors rather than interpretations.
Practice active listening by repeating concerns back: “You’re worried about missing work again for another appointment.” This validates their experience while keeping dialogue constructive. Remember, the examiner assesses your composure, empathy, and problem-solving under pressure, not just the outcome.
Practical Procedure Examples for Skills Stations

Venipuncture Example with Commentary
Here’s a complete venipuncture procedure that demonstrates proper OSCE performance. Begin by introducing yourself and confirming the patient’s identity using two identifiers—typically name and date of birth. Explain the procedure clearly: “I’ll be taking a blood sample from your arm today. You’ll feel a small pinch, but it should only take a minute.”
Gather equipment on a clean tray: tourniquet, alcohol wipes, appropriate needle and collection tubes, gauze, tape, and sharps container. Perform hand hygiene visibly and don gloves while explaining each step to maintain patient comfort.
Apply the tourniquet 3-4 inches above the planned puncture site and palpate for a suitable vein. Clean the site using circular motions with an alcohol wipe, working outward, then allow it to dry completely—never fan or blow on it. Insert the needle at a 15-30 degree angle with the bevel up, watching for blood flashback.
Collect required samples in the correct order, release the tourniquet before removing the needle, and apply gentle pressure with gauze. Dispose of the needle immediately into the sharps container without recapping. Apply a bandage and check the patient feels well before concluding.
Throughout this procedure, examiners assess your sterile technique, patient communication, and safety protocols—demonstrating these comprehensively ensures strong marks.
Wound Management Example
In this common OSCE station, you’ll be assessed on technical skills, infection control, and patient communication simultaneously. Upon entering, you’ll typically find a standardized patient with a simulated wound requiring assessment and dressing.
Begin by introducing yourself and confirming patient identity. Explain the procedure clearly: “I’m going to examine your wound and apply a fresh dressing. I’ll tell you what I’m doing as we go along.” Always perform hand hygiene before donning gloves—examiners watch for this critical step.
Assess the wound systematically, noting size, depth, drainage type, and surrounding skin condition. Document findings precisely: “3cm laceration to right forearm, edges well-approximated, minimal serous drainage, no signs of infection.” Choose appropriate dressing materials based on wound characteristics, explaining your reasoning aloud when helpful.
Apply the dressing using aseptic technique, working from clean to dirty areas. Before finishing, provide clear discharge instructions: “Keep the dressing dry for 48 hours. Watch for increased redness, warmth, or discharge, and contact your doctor if these occur.” Document the procedure with time, wound appearance, dressing type applied, and patient education provided. This comprehensive approach demonstrates both technical competency and patient-centered care.
Basic Life Support Scenario
In a Basic Life Support scenario, you’ll demonstrate CPR technique and emergency response protocols. The examiner might present an unresponsive manikin requiring immediate intervention. Begin by assessing scene safety and checking responsiveness by tapping the patient’s shoulders and calling out. When there’s no response, immediately call for help and request emergency equipment. Check for breathing by observing chest rise for no more than 10 seconds while simultaneously checking for a pulse at the carotid artery.
If no pulse is detected, position yourself correctly and begin chest compressions at a depth of 5-6 centimeters at a rate of 100-120 compressions per minute. Communicate clearly with your team, counting compressions aloud and coordinating roles. After 30 compressions, deliver two rescue breaths using proper head-tilt-chin-lift technique. Continue this 30:2 ratio until the defibrillator arrives. When the AED is ready, apply pads correctly, ensure everyone stands clear during rhythm analysis, and follow voice prompts. Effective team communication throughout—announcing actions, confirming safety checks, and coordinating switches to prevent fatigue—demonstrates competency beyond technical skills alone.
How to Use These Examples in Your Study Routine
Maximizing your OSCE preparation requires strategic use of examples rather than passive reading. Research shows that active practice using realistic scenarios improves performance by up to 40% compared to traditional study methods alone.
Start with solo practice by working through examples independently. Read the scenario, set a timer matching actual exam conditions, and perform the station as if a real examiner were present. Verbalize your thoughts, practice your physical examination techniques on a pillow or family member, and complete the task fully. This builds confidence and helps identify knowledge gaps early.
Next, incorporate peer practice sessions. Partner with classmates and take turns playing patient, examiner, and candidate roles. The student acting as examiner should use checklists derived from example stations to provide structured feedback. A 2022 study found that students who engaged in peer-to-peer OSCE practice scored 15% higher than those who studied alone. This collaborative approach mirrors real exam conditions while providing immediate constructive feedback.
Recording yourself transforms your preparation significantly. Use your smartphone to film practice sessions, then review your performance critically. Watch for non-verbal communication issues, awkward pauses, unclear explanations, or missed checklist items. Many students discover they speak too quickly when nervous or forget to introduce themselves properly—issues easily corrected once identified.
Create personalized checklists from each example you study. Extract key steps, essential questions, and critical actions into a standardized format. These checklists serve double duty: practice tools during preparation and quick reference guides for effective memorization techniques before your exam.
Schedule regular practice intervals rather than cramming. Distribute your example-based practice over weeks, revisiting challenging stations multiple times. This spaced repetition approach, combined with varied station types, ensures comprehensive preparation across all competency areas you’ll encounter during your actual OSCE assessment.
Where to Find More Quality OSCE Examples
Finding quality OSCE examples requires tapping into diverse, reliable resources. Academic textbooks remain foundational sources—titles like “OSCE Cases with Mark Schemes” by Susan Shelmerdine and “Clinical Skills for OSCEs” by Neel Burton provide structured scenarios with detailed marking criteria. According to a 2022 survey of medical students, 73% found dedicated OSCE textbooks valuable for understanding examiner expectations and station formats.
Online platforms have revolutionized OSCE preparation. Websites like Geeky Medics and OSCEstop offer free video demonstrations and downloadable scenarios across multiple specialties. YouTube channels run by qualified clinicians provide visual walkthroughs that complement written examples. Many platforms update content regularly to reflect current clinical guidelines, ensuring relevance.
University resources often provide the most exam-specific material. Check your institution’s learning management system for past station examples, faculty-created practice scenarios, and recording libraries. Medical education departments frequently archive previous OSCE materials—research shows students who access institutional resources score 15% higher on average than those relying solely on external sources.
Peer study groups create opportunities for collaborative learning. Forming groups of 4-6 students allows rotation through examiner, candidate, and observer roles. This active practice using shared examples develops both performance and assessment skills critical for comprehensive med school preparation.
When evaluating example quality, verify the source’s credentials and publication date. Quality examples include clear objectives, realistic patient scenarios, structured mark schemes, and examiner guidance. Adapt examples by modifying patient demographics, adding complexity for advanced practice, or tailoring communication challenges to your curriculum’s emphasis. Cross-reference multiple sources to identify core competencies consistently assessed across different institutions, ensuring your preparation covers essential skills regardless of specific station variations.
Mastering OSCEs requires more than reading through examples—it demands active, hands-on practice that transforms theoretical knowledge into clinical competence. Research shows that students who engage in deliberate practice with diverse OSCE scenarios perform significantly better than those who rely on passive review alone. The examples presented throughout this guide represent just the starting point of your preparation journey.
Each scenario you’ve encountered here offers a template for building your clinical skills, but true confidence emerges when you actively rehearse these situations with peers, family members, or study groups. Set up mock stations, practice your communication techniques aloud, and physically perform examination maneuvers until they become second nature. Time yourself, seek feedback, and iterate on your approach just as you would in the actual exam environment.
Remember that every OSCE station you encounter—whether in practice or the real exam—contributes to your development as a healthcare professional. These assessments aren’t merely hurdles to overcome; they’re opportunities to refine the patient-centered skills you’ll use throughout your career. Approach your preparation with intention, practice with purpose, and trust that your consistent effort will translate into both exam success and genuine clinical competence that serves your future patients well.