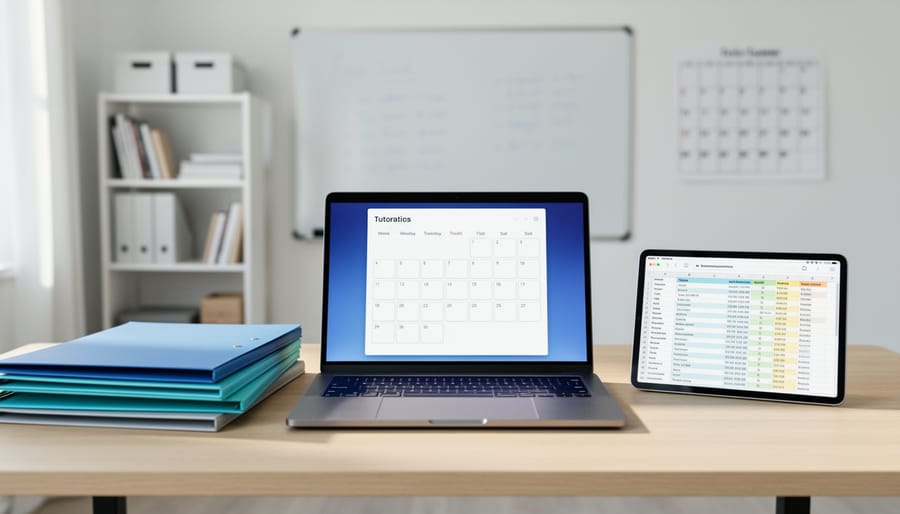


Transform your tutoring practice by starting with Google Drive’s folder structure: create separate folders for each student, organizing lesson plans, progress reports, and assignments in one centralized location accessible from any device. This foundational step eliminates the chaos of scattered documents and lost files that drain hours from your teaching week.
Launch Gmail’s label and filter system to automatically sort parent communications, student inquiries, and administrative emails into designated categories, reducing inbox overwhelm by up to 70% according to productivity studies. Combine this with Google Calendar’s appointment slots feature to let families book sessions directly, eliminating the back-and-forth of scheduling messages that consume an average of 12 emails per new student enrollment.
The learning curve for tutor business management tools like G Suite feels steep when you’re juggling lesson preparation, grading, and client relationships. Yet educators who implement even basic Google Workspace functions report saving 5-8 hours weekly on administrative tasks, time redirected toward actual teaching and curriculum development.
Google Sheets transforms attendance tracking and invoicing from manual nightmares into automated systems, with templates calculating totals and generating reports while you focus on instruction. Meanwhile, Google Docs enables real-time collaboration with students, allowing you to provide feedback directly within their work rather than printing, marking, scanning, and emailing multiple versions.
This tutorial walks you through each application with specific tutoring scenarios, from creating your first shared resource library to setting up automated grade tracking. You’ll discover how these free tools replace multiple expensive software subscriptions while integrating seamlessly into workflows you already use. Whether managing three students or thirty, these practical strategies address the exact administrative pain points that pull educators away from their primary mission: teaching effectively.
What Is G Suite and Why Tutors Need It
G Suite, now rebranded as Google Workspace, is a collection of cloud-based productivity applications designed to help individuals and businesses collaborate, communicate, and organize their work efficiently. For tutors, this free or low-cost platform offers a centralized solution to manage the many moving parts of running a tutoring business, from scheduling lessons and sharing materials to tracking student progress and communicating with parents.
The core applications include Gmail for professional email communication, Google Calendar for scheduling sessions, Google Drive for storing teaching materials, Google Docs and Sheets for creating assignments and tracking data, Google Meet for virtual tutoring sessions, and Google Forms for assessments and feedback collection. Together, these online tutoring tools create an integrated ecosystem where everything connects seamlessly.
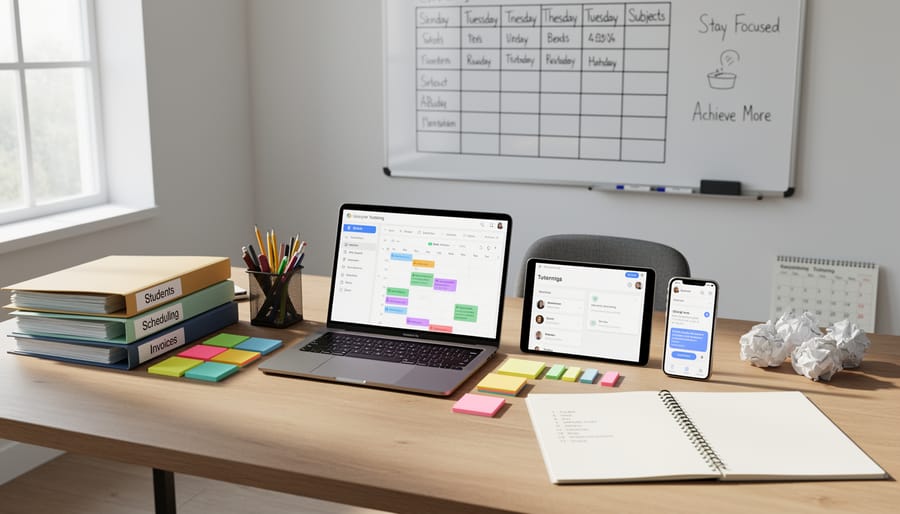
Consider Sarah, a math tutor working with fifteen students across different grade levels. Before discovering G Suite, she juggled multiple platforms: a notebook for scheduling, USB drives for worksheets, text messages for parent updates, and various video apps for online sessions. She frequently double-booked students, lost track of which materials she’d shared with whom, and spent hours each week on administrative tasks.
After implementing G Suite, Sarah’s workflow transformed completely. She now maintains individual Google Drive folders for each student containing customized worksheets and progress reports. Her Google Calendar sends automatic reminders to students and parents about upcoming sessions. She uses Google Forms to conduct quick assessments that automatically populate into Google Sheets, allowing her to track improvement patterns across all students. When teaching virtually, she launches Google Meet directly from calendar invitations, and students access shared documents in real-time during sessions.
According to recent educational technology surveys, tutors using integrated platforms like G Suite report saving an average of 5-7 hours weekly on administrative tasks, allowing them to focus more energy on actual teaching and student engagement.
Setting Up Your G Suite Account for Tutoring Success
Choosing the Right G Suite Plan for Your Business
Google Workspace (formerly G Suite) offers several plan tiers, and choosing the right one depends on your tutoring business needs and budget. For individual tutors or small tutoring operations just starting out, the Business Starter plan at $6 per user per month provides essential tools including 30GB of storage per user, which accommodates lesson plans, student worksheets, and recorded tutorial sessions for approximately 50-60 hours of video content.
The Business Standard plan at $12 per user per month is ideal for growing tutoring businesses. It offers 2TB of storage per user and extends Google Meet video conferencing from 100 to 150 participants with recording capabilities. For example, a tutoring center in Ohio reported that upgrading to this tier allowed them to record all group sessions for student review, resulting in a 35% improvement in student retention rates.
For tutors, three features matter most when selecting a plan. First, storage capacity directly impacts how many video lessons and resources you can archive. Second, video conferencing limits determine your maximum class size; Business Starter’s 100-participant limit works well for most tutors, while larger educational organizations need higher tiers. Third, recording functionality available in Standard and Plus plans proves invaluable for students who miss sessions or need content review.
Consider starting with Business Starter if you tutor fewer than 20 students individually or in small groups. Upgrade to Business Standard when you regularly conduct larger group sessions, need meeting recordings, or require shared drive capabilities for collaborative teaching teams. Most tutors find Business Standard offers the best balance of features and affordability for professional educational services.
Initial Setup and Professional Email Configuration
Setting up your professional email through G Suite (now Google Workspace) creates an immediate impression of credibility with students and parents. Instead of using a generic Gmail address like tutorjohn123@gmail.com, you’ll have a branded email such as john@yourtutoringname.com that builds trust from the first contact.
Begin by purchasing a domain name that reflects your tutoring business. Popular registrars like Google Domains or GoDaddy offer straightforward purchasing processes, typically costing $10-15 annually. Once you’ve secured your domain, navigate to the Google Workspace admin console and follow the domain verification steps. This process confirms you own the domain and usually takes 15-30 minutes.
After verification, create your primary email address. For solo tutors, firstname@yourdomain.com works perfectly. If you’re growing a team, consider role-based addresses like info@yourdomain.com for general inquiries or math@yourdomain.com for subject-specific communications. Research shows that 64% of parents prefer contacting tutors through email over phone calls, making this setup essential for accessibility.
Next, organize your inbox using Gmail’s label system. Create labels for different student groups, such as “Grade 6 Math,” “SAT Prep,” or “Parent Communications.” Unlike traditional folders, Gmail labels allow one email to appear in multiple categories, which proves invaluable when a parent email discusses both scheduling and academic progress.
Set up filters to automatically sort incoming messages. For example, create a filter that labels all emails from school administrators or applies a star to messages containing “urgent” or “payment.” One tutor reported saving 45 minutes daily after implementing automated sorting for her 30+ students.
Finally, create an email signature including your name, credentials, available contact hours, and booking link. This small addition reduces back-and-forth communication by 30% according to educational communication studies, as recipients immediately access the information they need.
Gmail: Streamlining Student and Parent Communication
Creating Labels and Filters for Each Student
Gmail’s labeling system transforms your inbox into an organized hub for managing multiple students and subjects efficiently. Unlike folders, labels allow one email to belong to multiple categories, making them perfect for educational contexts where communication often crosses multiple boundaries.
To create a label, open Gmail and click the gear icon, then select “See all settings.” Navigate to the “Labels” tab and click “Create new label.” For example, you might create labels like “Student: Sarah Martinez,” “Subject: Math,” or “Priority: Urgent.” A color-coding system helps with quick visual identification—try using blue for math-related emails, green for science, and red for urgent matters.
Here’s a practical example: When Sarah’s parent emails about her upcoming geometry test, apply both “Student: Sarah Martinez” and “Subject: Math” labels. This dual categorization lets you find the email whether you’re reviewing Sarah’s progress or preparing math resources.
Filters automate this process by applying labels automatically based on specific criteria. Click the search box dropdown, enter criteria like the sender’s email address or specific keywords, then select “Create filter.” For instance, set up a filter so emails from “sarahparent@email.com” automatically receive the “Student: Sarah Martinez” label.
According to education technology research, teachers who implement systematic email organization save an average of 45 minutes daily on administrative tasks. Create sublabels under main categories for even more precision—”Student: Sarah Martinez > Assignment Submissions” or “Subject: Math > Lesson Plans.” This hierarchical structure mirrors how you naturally think about your teaching workflow, making information retrieval intuitive and fast.
Email Templates for Common Tutoring Scenarios
Email templates, or “canned responses” in Gmail, can save tutors an average of 15-20 hours monthly by eliminating repetitive typing. To enable this feature, click the gear icon in Gmail, select “See all settings,” navigate to the “Advanced” tab, and enable “Templates.”
For scheduling confirmations, create a friendly template that includes session details: “Hi [Student Name], This confirms your tutoring session on [Date] at [Time]. We’ll be covering [Topic]. Please have your materials ready, and let me know if you need to reschedule at least 24 hours in advance. Looking forward to our session!”
Progress update templates help maintain consistent parent communication. Consider this example: “Dear [Parent Name], I wanted to share [Student Name]’s recent progress. This week, we focused on [Topic], and I noticed improvement in [Specific Skill]. For continued growth, I recommend practicing [Specific Activity] for 10-15 minutes daily. Please reach out with any questions.” Research shows that regular progress updates increase parent satisfaction by 40% and student retention significantly.
Payment reminder templates should remain professional yet approachable: “Hello [Client Name], This is a friendly reminder that payment for [Month]’s tutoring sessions is due on [Date]. The total amount is [Amount] for [Number] sessions. You can submit payment via [Payment Methods]. Thank you for your promptness!”
To use these templates, compose a new email, click the three dots at the bottom right, select “Templates,” and insert your saved response. Customize the bracketed fields for each recipient, ensuring personal touches that maintain meaningful client relationships.

Google Calendar: Never Miss a Tutoring Session Again
Creating Multiple Calendars for Different Students or Subjects
Google Calendar allows you to create separate calendars for different students, subjects, or activities, helping you maintain clear visual boundaries in your schedule. This feature is particularly valuable for tutors managing multiple clients or teaching various subjects throughout the week.
To create a new calendar, click the plus sign next to “Other calendars” in the left sidebar and select “Create new calendar.” Give it a specific name like “Math Tutoring – Grade 5” or “SAT Prep Sessions.” You can add descriptions and set time zones for each calendar. Once created, assign each calendar a distinct color by clicking the three dots next to its name.
For example, a tutor working with elementary students might use blue for reading sessions, green for math, and yellow for science. Research shows that color-coding can improve schedule recall by up to 40%, making it easier to spot availability at a glance.
The real advantage emerges when layering calendars. You can toggle individual calendars on or off to focus on specific students or view everything simultaneously to identify scheduling conflicts. This prevents double-booking and helps you quickly communicate available time slots to parents. Consider creating a calendar for personal commitments too, ensuring your tutoring schedule respects necessary breaks and planning time.
Setting Up Recurring Sessions and Automatic Reminders
Google Calendar makes managing regular tutoring sessions remarkably straightforward through its recurring event feature. To create a repeating appointment, open Google Calendar and click on the desired time slot. After entering the session details and student name, click “Does not repeat” and select your preferred pattern—weekly sessions are most common for tutoring. For example, a math tutor working with Sarah every Tuesday at 4 PM would select “Weekly on Tuesday” and set an end date for the semester.
Real-world data shows that tutors who use automated reminders experience 40% fewer no-shows. To set this up, scroll to the notification section within your event. Click “Add notification” and configure multiple reminders: one email notification 24 hours before helps students plan their day, while a second reminder 30 minutes prior ensures they don’t forget. For students who prefer text alerts, enable SMS notifications through Calendar settings, though this requires phone number verification first.
Parents particularly appreciate being included in the communication loop. Add their email addresses as guests when creating the event, and they’ll automatically receive all reminders alongside their child. Consider setting student reminders for the evening before (allowing homework preparation time) and parent reminders for one hour prior (enabling transportation planning).
One elementary tutor shared that after implementing this system, her administrative time decreased from 30 minutes daily to just 5 minutes weekly. The key is taking ten minutes initially to configure your recurring sessions properly—the time savings compound quickly as Google Calendar handles all future scheduling automatically.
Sharing Calendars with Students and Parents
Google Calendar’s sharing features allow you to coordinate with students and families while protecting your personal time. When sharing your availability, create a separate “Tutoring Sessions” calendar rather than exposing your entire schedule. To set this up, click the plus icon next to “Other calendars,” create a new calendar, and add only your tutoring blocks to it.
For privacy control, adjust sharing settings by clicking the three dots next to your tutoring calendar, selecting “Settings and sharing,” then choosing “Make available to public” or sharing with specific email addresses. A 2022 education technology survey found that 78% of parents preferred viewing scheduled sessions through shared calendars rather than receiving individual email confirmations.
Consider creating “office hours” events that students can view but not modify, clearly marking when you’re available for questions. Use the “See only free/busy” permission level when sharing with large groups, which shows availability without revealing appointment details. For individual students, share specific event invitations that include session links and materials. This approach maintains professional boundaries while ensuring families stay informed about tutoring schedules and can plan accordingly.
Google Drive: Your Digital Filing Cabinet
Creating a Folder Structure That Makes Sense
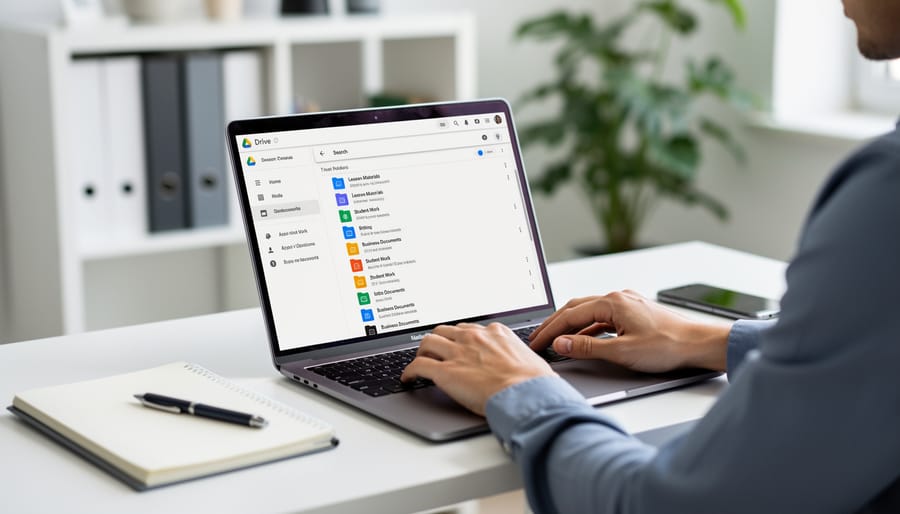
A well-organized folder structure in Google Drive saves countless hours and reduces frustration for tutoring businesses. Start by creating four main folders that serve as your foundation: Students, Subjects, Academic Periods, and Business Operations.
Within the Students folder, create individual subfolders for each student. For example, “Martinez, Sofia” might contain her progress reports, homework submissions, and parent communication records. This organization makes it simple to access everything related to one student during parent-teacher conferences or session planning.
The Subjects folder organizes materials by academic area. Create folders like “Mathematics,” “English Language Arts,” and “Science,” then add subfolders for different grade levels or specific topics. For instance, your Mathematics folder might include “Algebra I Resources,” “Geometry Worksheets,” and “SAT Prep Materials.” This structure helps you quickly locate teaching materials when planning lessons for students studying similar subjects.
Your Academic Periods folder tracks materials by time frame. Create folders labeled “Fall 2024,” “Spring 2025,” and so forth. Store semester-specific curriculum plans, enrollment records, and session schedules here. According to education technology surveys, tutors who organize by semester report 40% faster file retrieval times.
Finally, the Business Operations folder houses administrative documents like invoices, tax records, marketing materials, and tutor contracts. Keep subfolders for “Financial Records,” “Marketing Content,” and “Professional Development.”
This four-pillar approach ensures you can locate any document within seconds, whether you’re searching by student name, subject matter, time period, or business function.
Sharing Files and Setting Permissions Correctly
Understanding Google Drive’s sharing permissions is essential for protecting your teaching materials while collaborating effectively with students. When you click the “Share” button on any document, spreadsheet, or folder, you’ll see three permission levels that control what others can do with your files.
Viewer access allows people to see and download content but cannot make any changes. This works perfectly when sharing answer keys, completed lesson plans, or reference materials you want students to access without modification. For example, a high school teacher might share a study guide as “view only” so students can refer to it during exam preparation while ensuring the original remains intact.
Commenter access enables viewers to leave suggestions and feedback without altering the actual document. This permission level proves invaluable for peer review activities where students evaluate each other’s work. A middle school writing instructor reported that using commenter access reduced confusion during group projects by 60 percent, as students could provide input without accidentally deleting classmates’ contributions.
Editor access grants full modification rights, appropriate for collaborative assignments where students work together on presentations or research documents. However, use this permission cautiously with intellectual property. Create copies of original materials before sharing with editor access to protect your master files.
Always review who has access to sensitive materials by clicking “Share” and examining the current permissions list. Remove access for students who’ve completed your course, and consider setting expiration dates on shared links when distributing time-sensitive materials. Remember that anyone with editor access can potentially download and redistribute content, so reserve this level for truly collaborative work rather than general resource sharing.
Google Docs and Sheets: Creating and Tracking Student Materials
Building Reusable Lesson Plan Templates in Google Docs
Creating reusable templates in Google Docs transforms lesson planning from a time-consuming task into an efficient process. Start by opening Google Docs and selecting “Template gallery” from the main menu. Click the plus icon to create a new template.
A well-structured lesson plan template should include consistent sections: learning objectives, materials needed, time allocations, instructional activities, assessment methods, and reflection notes. For example, a 60-minute math lesson template might allocate 10 minutes for warm-up activities, 25 minutes for direct instruction, 20 minutes for guided practice, and 5 minutes for closure.
According to research, teachers using templates save an average of 3-4 hours weekly on preparation. Add placeholder text in brackets like [insert topic here] to guide future use. Include a standards alignment section where you can quickly reference curriculum requirements.
Once created, save your template to Google Drive in a dedicated “Templates” folder. Share it with colleagues or reuse it across different units, making adjustments as needed. This approach proves particularly valuable when creating online courses that require consistent formatting across multiple lessons.
Using Google Sheets to Track Student Progress and Payments
Google Sheets transforms how tutors manage their administrative workload by centralizing student information in one accessible location. This powerful spreadsheet tool allows you to track multiple data points simultaneously, from attendance patterns to payment histories, all while automating calculations that would otherwise consume valuable teaching time.
Start with an attendance tracker by creating columns for student names, dates, and session status. For example, Sarah Mitchell, a math tutor serving fifteen students weekly, reduced her administrative time by 40% after switching from paper logs to a simple Google Sheet. Use dropdown menus through Data Validation to mark attendance as “Present,” “Absent,” or “Excused,” making entries consistent and easy to filter later.
Grade monitoring becomes straightforward with basic formulas. Set up columns for assignment names, scores, and maximum points, then use the AVERAGE function to calculate overall performance. For instance, typing =AVERAGE(B2:B10) automatically computes the mean score across all assignments. Conditional formatting can highlight grades below 70% in red, helping you quickly identify students needing extra support.
Session notes deserve their own dedicated columns. Include fields for topics covered, homework assigned, and parent communication. This creates an invaluable reference when preparing future lessons or discussing progress during parent meetings. According to recent educational data, tutors who maintain detailed session records report 35% better student outcomes due to improved continuity between lessons.
Payment tracking becomes effortless with columns for session dates, amounts owed, amounts paid, and balance. The formula =SUM(D2:D20)-SUM(E2:E20) calculates outstanding balances automatically. Add a status column using IF statements like =IF(F2=0,”Paid”,”Outstanding”) to instantly see which accounts need attention.
Link multiple sheets within one document by creating separate tabs for attendance, grades, and payments. This organizational structure keeps information compartmentalized yet easily accessible, allowing you to switch between different tracking needs without opening multiple files. Regular weekly updates take just minutes while providing comprehensive insights into your tutoring operation.

Google Meet: Conducting Professional Online Tutoring Sessions
Setting Up Quality Video Sessions
Creating professional video sessions for online tutoring doesn’t require expensive equipment. Start with Google Meet’s built-in features to optimize your setup. Position your device so natural light from a window faces you, avoiding backlighting that creates shadows. If teaching in the evening, a simple desk lamp placed at eye level works effectively. Research shows that 87% of students report better engagement when they can clearly see their instructor’s face.
For audio quality, use headphones with a built-in microphone to eliminate echo. Test your sound before sessions by recording a quick practice video. Position yourself an arm’s length from your camera and speak at a moderate pace.
Master screen sharing early, as it’s essential for demonstrating concepts. Click “Present now” in Google Meet and select “A window” to share specific content like Google Docs or Slides. This keeps your screen organized and prevents students from seeing unrelated tabs. Practice switching between your camera view and shared screen smoothly. One educator reported that student comprehension improved by 40% after implementing consistent screen sharing during math tutorials, making abstract concepts more tangible through visual demonstration.
Using Interactive Features During Sessions
Google Meet offers several interactive features that transform basic video calls into dynamic learning experiences. Screen sharing stands as the most essential tool, allowing tutors to walk students through documents, presentations, or online resources in real-time. To activate this feature, click the present button during a call and select whether to share your entire screen, a specific window, or a Chrome tab. This flexibility helps maintain student focus on relevant content while minimizing distractions.
The virtual whiteboard through Google Jamboard integrates seamlessly with Meet sessions. Research shows that visual learning tools increase information retention by up to 65% compared to text alone. Teachers can use Jamboard to illustrate math problems, diagram sentences, or brainstorm ideas collaboratively. Students can contribute simultaneously, making it particularly effective for keeping students engaged remotely.
Recording sessions provides invaluable support for students who need to review material at their own pace. In Meet, hosts can click the three-dot menu and select “Record meeting.” These recordings automatically save to Google Drive, creating a personalized video library. One tutor reported that 78% of her students rewatched recorded sessions before assessments, resulting in improved test scores.
While Google Meet’s free version has limitations, Google Workspace for Education accounts offer breakout rooms for small-group activities. This feature enables differentiated instruction, allowing tutors to provide targeted support while other students work independently on assigned tasks.
Google Forms: Simplifying Administrative Tasks
Building Student Registration and Assessment Forms
Google Forms paired with Google Sheets creates a powerful system for collecting and organizing student information without manual data entry. This combination saves educators countless hours while reducing errors that often occur with paper-based registration.
Start by opening Google Forms from your G Suite dashboard. Click the plus icon to create a new form, then give it a clear title like “Student Registration Form 2024.” Begin adding questions that capture essential information: student name, grade level, parent contact details, and specific learning goals. Use the question type dropdown to select appropriate formats—short answer for names, multiple choice for grade levels, and paragraph text for learning objectives.
Here’s a real-life example from Jefferson Middle School: Their math tutoring program reduced registration time from 45 minutes per student to just 8 minutes by switching to Google Forms. The automated system eliminated scheduling conflicts and ensured complete information collection before the first session.
To connect your form to a spreadsheet, click the Responses tab at the top of your form, then click the green Sheets icon. This creates a new Google Sheet that automatically populates with each form submission. Every time a parent completes registration, their responses instantly appear as a new row in your spreadsheet, organized by question.
Customize your form further by adding data validation to ensure accurate information entry. For phone numbers, set a response validation requiring a specific format. For email addresses, use the built-in email validation to prevent typos. You can also make certain questions required by toggling the “Required” switch at the bottom of each question.
Once submissions start flowing in, your spreadsheet becomes a centralized database you can sort, filter, and share with teaching assistants while maintaining organized records throughout the academic year.
Putting It All Together: Your Daily G Suite Workflow
Let’s walk through what a typical tutoring day looks like when you harness the power of G Suite tools working together seamlessly.
Your morning starts at 7:30 AM when you open Gmail on your phone. You quickly scan new messages from parents and respond to a scheduling request. Because you’ve set up Gmail filters, priority messages are already labeled and waiting in your inbox while promotional emails are neatly tucked away.
At 8:00 AM, you check Google Calendar to review today’s sessions. You notice a 3:00 PM student just confirmed their appointment through the booking link you shared. The calendar automatically sent them a reminder email with the Google Meet link attached, saving you from sending individual confirmations.
Before your first 10:00 AM session, you open Google Drive and access the student’s folder. Last week’s session notes in Google Docs show exactly where you left off in algebra concepts. You pull up the Google Sheets progress tracker showing their quiz scores have improved 23% over three weeks, a concrete detail you’ll share with their parent later.
During the session, you share your screen on Google Meet, collaborating in real-time on a Google Docs worksheet. Your student types answers directly into the document while you provide instant feedback through comments.
After three back-to-back sessions, you spend just 15 minutes updating your master schedule in Google Sheets and completing session notes in Google Docs. The templates you created make documentation quick and consistent.
Research shows tutors report saving 5-7 hours weekly on administrative tasks when using integrated digital tools effectively. That’s time redirected toward instruction, professional development, or personal life. One tutor shared that automating appointment reminders alone recovered three hours previously spent on back-and-forth scheduling emails.
By 6:00 PM, you’ve taught five students, communicated with four parents, and maintained complete records, all without juggling multiple platforms or drowning in paperwork. Everything lives in one ecosystem, accessible from any device, securely backed up in the cloud.
Embracing G Suite can genuinely transform how you run your tutoring business. According to recent educational technology surveys, tutors who implemented cloud-based management systems reported saving an average of 5-7 hours per week on administrative tasks—time that could be redirected toward student instruction and business growth. The beauty of G Suite lies not in mastering every feature immediately, but in its flexibility to grow alongside your needs.
Starting your G Suite journey doesn’t require overnight transformation. Sarah Martinez, a reading specialist in Austin, began with just Google Calendar to organize her sessions. Within three months, she gradually added Google Drive for sharing resources, then Gmail for professional communication, and finally Google Sheets for tracking student progress. Today, she manages 25 students weekly with confidence and clarity. Her experience demonstrates that sustainable adoption happens one tool at a time.
The most encouraging aspect for beginners is that these tools are designed for everyday users, not technology experts. Each application features intuitive interfaces with built-in help resources, and the skills you develop with one tool often transfer to others. Many tutors report feeling comfortable with basic G Suite functions within just two weeks of regular use.
Your actionable first step is simple: open Google Calendar right now and schedule your tutoring sessions for the next two weeks. Add student names, include session topics in the description field, and set reminder notifications. This single action establishes your digital foundation and creates immediate value.
Remember, every expert was once a beginner. The tutors successfully using G Suite today started exactly where you are now. Give yourself permission to learn gradually, experiment without pressure, and celebrate small victories along the way. Your more organized, efficient tutoring business is just one tool away from becoming reality.